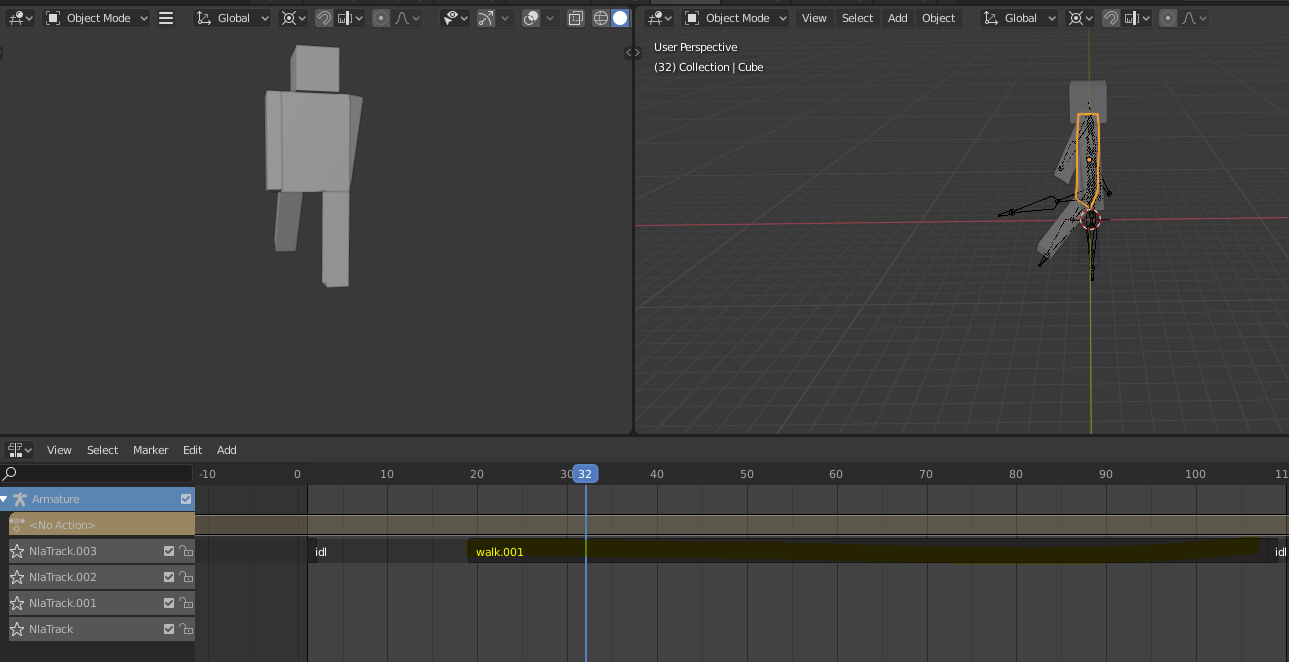
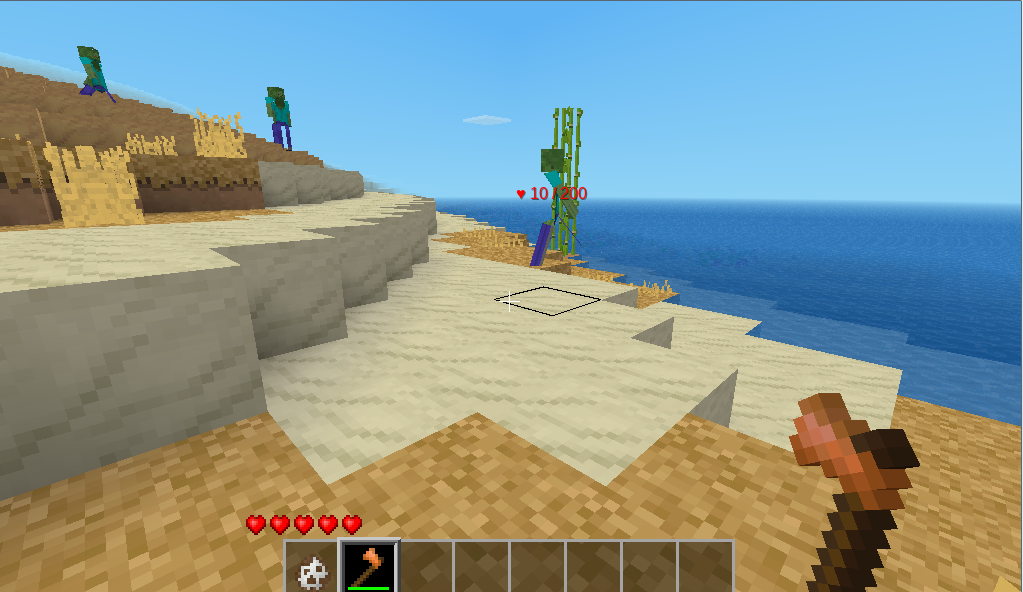
En los primeros dos artículos vimos como exportar nuestro modelo de blender a minetest y como crear los scrips de lua, ahora vamos a ver como dotar de algo mas de interacción nuestro personaje con el siguiente script:
if mobs.mod and mobs.mod== "redo" then

mobs:register_mob("zombie:zombie",{
--vida,armadura y reaccion
type = "monster",
passive = false,
attack_type = "dogfight",
reach = 2,
damage = 1,
hp_min = 5,
hp_max = 200,
armor = 200,
collisionbox={-0.5,-0.5,-0.5,0.5,0.5,0.5},
visual="mesh",
--Tamaño de nuestro modelo
visual_size = {x=2,y=2},
mesh="zombie.b3d",
drawtype="front",
textures={
{"zombie.png"}
},
--animacion
animation = {
speed_normal = 2,
--stand_start = 0,
--stand_end = 0,
walk_start = 19,
walk_end = 108,
punch_start = 19,
punch_end = 110,
}})

mobs:register_spawn("zombie:zombie",
{"default:dirt_with_grass", "ethereal:green_dirt"}, 20, 10, 15000, 1, 31000, true)
mobs:register_egg("zombie:zombie", "Zombie", "default_dirt.png", 1)

end
- En la declaración de animación, definimos cuales son los frames de nuestras animaciones, la api de mob_redo tiene varias acciones definidas por defecto por lo que no tenemos que poner el nombre de nuestras animaciones solo usar el nombre de las que queramos usar y poner los frames, pr ejemplo: en walk_start y walk_end definimos los frames donde empieza y termina nuestra animación de andar en blender.

- En la parte de punch_start y punch end definidmos los frames de nuestra aimacion de ataque de cuerpo a cuerpo(mele)
- En la seccion vida,armadura y reaccion definimos los puntos de vida,daño y armadura de nuestro modelo, asi como el tipo de ncp(monster,animal,npc) podemos ver los tipos definidos y propiedades de la api en el fichero api.txt de nuestro mod mobs_redo(https://notabug.org/TenPlus1/mobs_redo) que tendremos que tener cargado previamente, donde podremos ver todas las opciones disponibles y el script de lua de la api.
Mobs Redo API
=============
Welcome to the world of mobs in minetest and hopefully an easy guide to defining
your own mobs and having them appear in your worlds.
Registering Mobs
----------------
To register a mob and have it ready for use requires the following function:
mobs:register_mob(name, definition)
The 'name' of a mob usually starts with the mod name it's running from followed
by it's own name e.g.
"mobs_monster:sand_monster" or "mymod:totally_awesome_beast"
... and the 'definition' is a table which holds all of the settings and
functions needed for the mob to work properly which contains the following:
'nametag' contains the name which is shown above mob.
'type' holds the type of mob that inhabits your world e.g.
"animal" usually docile and walking around.
"monster" attacks player or npc on sight.
"npc" walk around and will defend themselves if hit first, they
kill monsters.
'hp_min' has the minimum health value the mob can spawn with.
'hp_max' has the maximum health value the mob can spawn with.
'armor' holds strength of mob, 100 is normal, lower is more powerful
and needs more hits and better weapons to kill.
'passive' when false allows animals to defend themselves when hit,
otherwise they amble onwards.
'walk_velocity' is the speed that your mob can walk around.
'run_velocity' is the speed your mob can run with, usually when attacking.
'stand_chance' has a 0-100 chance value your mob will stand from walking.
'walk_chance' has a 0-100 chance value your mob will walk from standing,
set to 0 for jumping mobs only.
'randomly_turn' if set to false then mob will not turn to face player or
randomly turn while walking or standing.
'jump' when true allows your mob to jump updwards.
'jump_height' holds the height your mob can jump, 0 to disable jumping.
'stepheight' height of a block that your mob can easily walk up onto,
defaults to 1.1.
Ahora nuestro zombie atacara cuando nos tenga cerca, y le podremos atacar con los parámetros que hemos definido, que podemos cambiarlos para que haga mas daño, tenga mas armadura, acciones etc.. por lo que solo nos queda trastear con esto y ir probando y disfrutando de este magnifico juego.
Happy Hacking !

Happy Hacking

Buena cosa :).
Por favor, hacemos petición de podcast de MODS de Minetest. Nos encantaría esto hablado.
Esto es una pasada. Gracias por compartirlo .
este es el unico sitio que he visto con algo que programacion en español para minetest… tenemos la misma idea en https://codeberg.org/minenux/ si alguien algun dia quiere ayudar
Pregunta cómo hago para descargar el mod de zombi en la version 5.8.0